So I finished this gon kit since before O Scale National 2009 in Baltimore. It was on display there. This kit is produced by St. Charles Model Works. Their website is here: http://www.scmodelworks.com/ Contact Terry or Sue if you want one of these kits. They retail for around $105 for the complete kit with trucks/couplers/parts.
Below is the construction process. Hopefully it will help or inspire others to build this kit. Its a good kit outside needing to heavily wash the resin to get rid of oils.
NOTE: ALL images are shown smaller than actually are. Click on images for higher-res photos if desired.
Here is what comes in the full kit:
Simple, right? Yup.
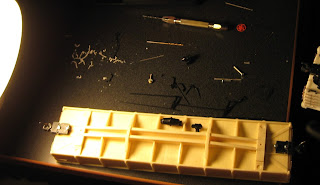
First step is to stand down any flash on the body castings.
After speaking to Terry on the phone, I found out the kit was designed
for a 1/32 metal plate in between the underframe and the body castings.
I planned on putting load inside and opted for some styrene cut down to
correct sizes.
The underframe was put on with CA, but epoxy may have been the smarter move. I have had no issues with the CA though.
Below are some tools I used to do this after looking at prototype
blueprints, pictures, etc. I have a digital caliper that I got at York
for $20. One of my best investments. To the left is also some rivets
and small modelers drill bits. A must for modelers. Time to put in
some grabs and their rivets that hold them in.
I then moved to do the sides, again using prototype photos. Each hole was drilled with a #76 bit and a pin vise.
Finally some work on adding the AB brakes (intermountain plastic sprues)
I replaced the plastic piping with wire.
Here is a shot of the B end with the brake wheel details and grab
irons. These are roughly done off pictures. The ends are not
dreadnaught, which is a flaw for post 1950, but it will make due on this
model.
The above picture shows the completed brake details. Note that I had
drilled holes through the underframe brackets for the brake lines to go
through. Thinking about it, I believe I forgot to add the air line to
this car from the air hoses. Oops. The end of the brake cylinder leg
is attached the the brake wheel via some scale chain. A good reference
for both AB and K brakes that I have used is here:
http://www.steamfreightcars.com/modeling/articles/brakes.pdf
The A end.
Completed 3/4 view.
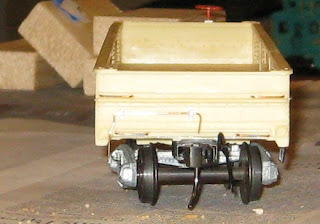
Not sure who made the trucks, but they're similar to weaver/athearn bettendorfs.
Below is the completed car with graceline 2R trucks. The 3R weaver
trucks' flanges were ridiculous and would not work with this kit. I
suppose someone could washer the heck out of the bolster, but that would
ruin the look of this car. 2R wheels run on newer track systems like
Gargraves/RCS switches, and AtlasO track these days anyways. No
problem. Almost ready for paint. Even with 2R trucks, the flanges hit
the underframe. Time to fix that next.
The photo is a little bright, but some more photos of the completed car.
Around this time I added the stirrups. I added them after the
trucks to ensure they wouldn't break off from handling.
Above is the decals and all the tools I use. I use a sharp metal
ruler and a sharp fresh X-acto blade to cut my decals. I have a special
brush I only use to put on the microscale solutions to put on decals. I
have not used the walthers solvaset in awhile. The paper bowl to the
left has warm water to soak the decals in. The car itself is behind the
solvasets. Note, paper bowls give up structural integrity over time.
Do not use them for water or cereal. I stick with plastic tupperware
now for the warm water I need to do decals.
Next is time to cut the decals:


From here, this is one finished side. You can see the rest of the
decals sitting behind the car. Again, a photo and blueprints were used
to figure out where to put decals. There are also some markings from a
cloverhouse dry transfers on the sides as well. Also note the decals on
the undersill. That was known by looking at the blueprints. You can
see that I upgraded from the paper bowl to the plastic tupperware and I
use a mcdonalds napkin to place my decals after 10 seconds in the
water. I use a pair of $4 needlenose tweezers to move the decals where I
want them. I won't go over how to do decals. That is explained on a
lot of other websites as well as the directions on the solvaset
bottles. The key is to gloss the heck out of the body before putting
the decals on. That and using the sharp X-acto to cut the decals will
help blend the edges of the decals into the paint and leave great
looking models. don't forget to gloss over it again and dull cote if
desired. That will protect the decals and help keep them from yellowing
in years to come.

The final result:
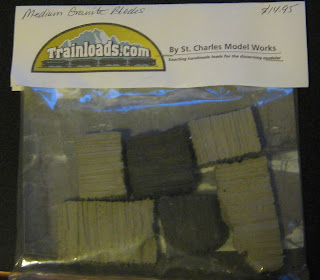
Again, the kit and the cool granite load can be had from St. Charles
Model Works. They guarantee everything and their kits and loads are
top notch. They even have a ton of coal loads, scrap bails, steel
plates, etc for your coal hoppers, gondolas, and flatcars.
Contact Terry or Sue Wellman at scmodelworks@illicom.net or 815-457-2453 for more information. Their website is www.scmodelworks.com . Everything they make is made in America.


