Sunset Models/3rd Rail just dropped their new F3's last week, which came in several phases and many paint schemes. From my units and everything I've seen online, these turned out to the be just as good as any other project Scott has ever done. Kudo's to Scott. Just superb.
I ended up getting four F3A units in Southern's Black Tuxedo paint scheme to bolster my locomotive roster and support Sunset Models's projects that align with my modeling era. The 2R units came with QSI Titan Decoders. While some look at these models and compare the cost to Lionel or MTH, I personally think the that these and the other roadnames, with specific phase-specific and road-specific detailing, along with smooth running characteristics and great support (if you even need it - I've only ever had one minor issue) make these well worth the price of admission.
Here's the original ad for reference:
3rd Rail EMD F3 Final Offering
Scott asked me to research and review the artwork and detailing of both the Southern Green and Black Tux units. After many hours over about a month and several back-and-forth revisions later, I provided the factory with my best effort of artwork/detailing review and road number choices. The lady that does the artwork is really talented and she is able to figure anything out with enough clues. Choosing road numbers was tough. The green units had two numbers that differed from the four numbers used on the black tux units. For both color schemes, it was important to choose numbers that reflected units that had the same level of detailing. The factory doesn't do one-offs for detailing, only per paint scheme. For the black tux units, I also tried to choose numbers that in addition to the same detailing, survived the longest and/or kept their steam generator equipment the longest. Research was done using both books from my library and online resources.
Some details may not match the prototype due to tooling, such as the reverse light. My research showed me these didn't have them, but it was already in the tool. Also, Southern, like many other roads, were quick to remove the fuel tank skirting to make it easier to find problems and access things in and around the fuel tank. The green units might get away with the skirts, though I've seen photos without them. The black tux units most definitely would need to be modified to correct this. The chosen F3A black tux units also were interesting in that the typical battery box configuration was replaced with a full height cover (except for 6706). Easier to model IMHO and different from F7A's.
Otherwise, I took a second glance at the final set of artwork and everything I had asked to be fixed, appears to be fixed and the black tux units came out beautifully. I haven't seen how the green units came out, but hope their owners are pleased with the effort that went into them.
After their initial lap around my layout, I've found I will need to do the following beyond simple lighting/sound/motor adjustments with the QSI Programmer to make my units more prototypical and fix a few mechanical issues:
Fix front Kadee coupler height. Either needs a shim or the pilot isn't level. Coupler too high.
Swap out 806 Short Kadee's for 745 Medium Prototype Head Kadee couplers. (805 replacement)
Repaint the cab interior light gray. Possibly replace the figures with better looking figures.
Tint the bright white LED's to make them warmer.
Eliminate light bleed by using liquid electrical tape and paint the back of the LED's for the headlight, reverse light, and cab light.
De-skirt and detail the fuel tanks appropriately per prototype. Might be possible with just styrene, or there is a guy on Shapeways that has a proper fuel tank, that may be able to supply adjusted parts to match the 3rd Rail measurements.
Investigate adding carry iron to rear along with cut levers. Parts exist on Shapeways and/or Scale City designs.
Use Microscale decals to add MU box on nose.
Add 4-hose air hoses to front of units. Possibly swap out the ones on back with magnets for connecting consists.
Might paint colored wires visible through grills dark gray.
Weather.
Enough talk, right? Onto the photo essay of opening night with the locomotives.
The four shipper boxes.
Manual Part 1.
These are found in the shipper and not inside the black/yellow box.
Manual Part 2.
Yes, I cropped out Scott's email on purpose.
Wrapped in the Box.
Spare parts in the bag.
Rooftop Tanks, Nathan M-5 horn, and firecracker antenna were well protected.
3/4 View - Fireman's Side.
Correct builders plate. Original Artwork had the other EMD emblem.
3/4 View - Engineer's Side.
Fireman's Side View.
I was surprised to see that the journals don't move vertically. I guess its less important on 2 axle trucks.
Engineer's Side View.
Look at the maintenance grab details.
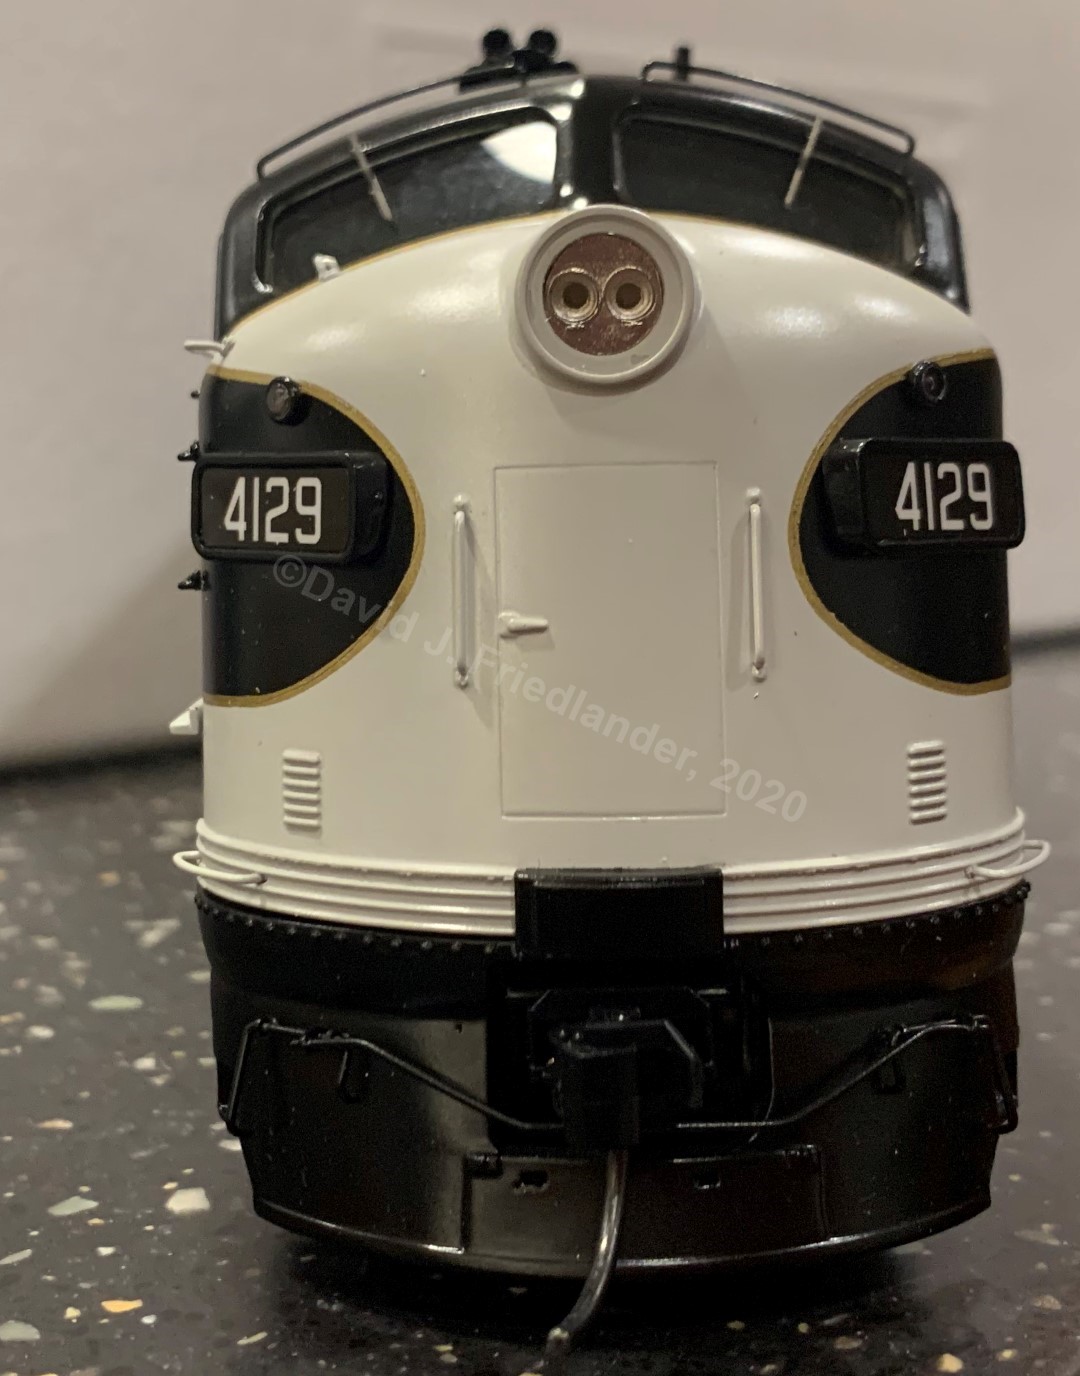
Front View.
Plan to add MU hatch by headlight and air hoses on pilot.
Rear View.
Plan to attempt to add the carry iron, coupler lift bars, and probably redo the oversized air hoses.
Top View.
Rooftop detailing.
Air tanks, equalizing bar, Nathan M-5 horn, and Firecracker Antenna.
Note the correct high-shroud radiator fans, and 48" DB fan housing.
Piping between tanks was one of two configurations.
48" DB Fan Hatch held on with magnets that conceal the reset controls.
Bottom View.
Really nicely detailed fuel tank.
Notice the Kadee 806 short couplers. Not sure why they used these, as they don't extended nor swing as well as 805's. Maybe Scott can raise the price a dollar or two and move to Kadee 745's in future projects. 😀
Road Numbers 1-4, L to R
My attempt at being artistic.
Spacing Between Units.
Elephant Style.
...Back-to-Back Style?
If you own a PSX, make sure you tune the overload Ampage higher than the 1.27A or you'll be on notch 3 and your engine(s) cuts off. Oops.
Starting Position up top. Ending position after ~30 feet.
Looks like I have some motor CV's to adjust.
Had one of my locomotives break away from the rest after being coupled together. Noticed there was a height issue on all of the front coupler and that all of the 'air hoses' were bent too far forward, hitting the pilot.
Rear Coupler is fine.
Also notice the "air hose" on the engine is way too forward. It was preventing me from coupling my A units elephant style as this would hit he front pilot of the previous unit.
Front Coupler needs to be adjusted or maybe the pilot is angled upward somehow.
Looks easily fixable.
Extreme light bleed from the reversing light.
Will be fixing with black liquid electrical tape from Lowes after tinting.
Cab interior is wrong color, but really nicely detailed.
Will most likely replace figures with better looking ones.
This is the engine compartment.
The cab light bleed. Easily fixed with black liquid electrical tape from Lowes.
The headlight bleeds into the cab.
Also easily fixed with liquid electrical tape.
Video.
All video shot on an iPhone XR. Its hard to stabilize a phone and use a throttle, so I bought a tripod mount for my phone that'll be coming soon, but for now, sorry for the slightly wobbly video.
Below is the inaugural run of the units after I tweaked the decoder settings in each unit to configure direction, lighting, and sound to make the A-A--A-A consist work in that exact order. Was too lazy to figure out consisting and renumber the engine addresses, etc.
Below is another video showing me put one unit through its paces from speed 0 to 99 using my Digitrax throttle.