Wednesday, December 10, 2014

Southern Railway Prototype Horn Information

Here is some information on Southern Railway horns from online sources that I wanted to capture here.

For a guide to railroad horns in general see: http://atsf.railfan. net/airhorns/

Nathan M Series Horns:

(From Ken Kanne)
With a couple of exceptions, M horns MUST be assembled with the numerical bell and chamber attached to the same-numbered port in the manifold for them to sound the designed notes. The throats in the manifold are size-matched to the bell and chamber openings. The two exceptions: The M3H has a #2 bell in the #1 position and #1 chamber with a #3 bell in the #2 position and #2 chamber, effectively raising the blown frequency of the two lower notes. The #4 bell and chamber are mounted in the normal #4 port. The other exception is the use of the very rare #0 (Zero, NOT O (oh) bell (220cps). It is mounted in the #1 position and #1 chamber, since there was never a "Zero" chamber made.
 
It is physically impossible to mount a #4 or #5 bell and chamber in the #1, #2 or #3 bell ports or vise-versa, since the bolt spacing is different. The 4 and 5 are "small bolt pattern" and the 1,2 and 3 are "large bolt pattern".
 

Nathan P Series Horns:

(From Pete Hodges)
The Southern  was one of the few roads that used so-called :"0-bells" on their P-horns which play the note A at 220 Hz, putting their root note down below Middle-C, making the horn enter the bass end of the tonal scale.

(From Evan Werkema)
Southern was a pretty big user of the P5 in later years, and Norfolk Southern continued specifying it on new power into the late 1980's. They had been a big user of the maintenance-intensive M5, and the P5 was a low maintenance alternative that played the same notes, albeit with a much tinnier sound. Unfortunately, the patterns for a number of the P bells drifted out of spec, resulting in some very unpleasant "new castings" P5's by the time NS gave up on them in the 80's.

Other interesting information:

The lower the bell #, the longer the bell and lower the frequency it plays.

(From Evan Werkema)
Fouling can cause a horn to harmonically overblow to a higher pitch, a phenomenon known in the vernacular as "squealing." Leslie Supertyfons were notorious for this, but Nathan/Airchime horns could also squeal under the right (that is to say, wrong) circumstances. When Amtrak relocated the horns on their F40PH's from the cab roof to a spot above the engine room directly behind the exhaust stack, the combination of heat and soot caused a number of interesting variations as different bells started squealing or going silent.

Leslie A-200's can be distinguished from Wabco E-2's by the prominent tab at the top of the power chamber and the flat back cap with four tabs. The Wabco E-2 lacks the tab at the top and has a more complex back cap with six tabs.


Below are examples of Nathan P5 horns.  Do not confuse these with Leslie Supertyfon horns, which have a larger manifold that has weight-saving holes in them:


Also, here are examples of P3 horns that are suspected of having the 0 bells installed:


Friday, October 31, 2014

Upgraded my Sunset Models FP7 from QSI Q2 sounds to QSI Q3 Titan sounds

I did a very quick video comparison to show how much better the bell, horn, (and prime mover) sound in the new Q3 sound files.

I advise every owner of any (not just FP7) Sunset Model locomotive with a QSI Titan DCC decoder to upgrade their models using a QSI programmer to the new sound files.  For now, Sunset Models will continue to put the older Q2 files in their locomotives.  They will let you borrow a QSI programmer if you ask them.  It does take a little bit of time to set up the software and read the manual to know how to use the software, but once you know how to use it, you can easily customize your locomotive and improve the sound quality.

Click on the video below to hear the difference.  Yes the video is shaky, too close up, (plus many more problems, etc), but the point of this video is hearing the locomotive. I'll do better videos of QSI Q3 files in the future as I find time to install Titan decoders in my models.


Sunday, June 22, 2014

Guess Who

One of about eight concurrent projects taking major shape today...enjoy a glimpse of a model more detailed than any imported brass, but requiring many grueling hours.  Good thing I'm only ever going to make two.  While I would be saddened if they did, I truly doubt the importers will pony up the tooling cost to ever to do these in plastic.


Saturday, April 26, 2014

York News! PRR GLa Hoppers, PRR 2D-F8 trucks, USRA Hoppers, and 86' Auto Parts Hi-Cubes! Lionel Hopper projects including the PRR GLa

At York, Lionel was making a big deal about how they're able to faithfully do 3 different types of hoppers including the PRR GLa.  I did not ask them if they were planning to just repaint the PRR GLa into other paint schemes, but maybe someone else did.  If you read on of the posters I'm about to attach, they did say he USRA hoppers were within 12" of the GLa.

They did not have 3D-printed mockups at the show.

Also of interest...Lionel is investing in tooling for the correct truck under the GLa, the PRR 2D-F8 truck.

Can't read them as is?  Click em for higher resolution.


And perhaps just as important to the 1960s and onward modelers - 86' auto parts boxcars!  Lionel had 3D-printed mock ups of the 4-door and 8-door 86' boxcars.  They will include kadee coupler pad mounting as shown (I should have asked them did they ensure that the kadee will be at the right height...).  For the 3R guys, they developed a nifty coupler adjusting mechanics that attach to the car.  The car also looks like it will sit at the right height with the Lionel trucks.  The underbody details and door appliances will be separately applied.  The stirrups had broken off the sample they had there, but the details were 3D printed too (not brass).

UPDATE:  The nifty adjusting piece will also allow for a scale coupler attachment to allow guys with kadees to also take advantage of running the scale couplers.

I didn't take a scale ruler out to these, but they look like a winner.  If you see a problem, better tell Lionel now!


stirrups were broken off model


The above parts are not brass on the mock up, thus the damage.


 truck height looked right.


WBB O Scale 44 Tonner

There is a lot of interest in this engine, both 3R and 2R.

UPDATE: MTH has announced secretly at York that they are looking at their 2015 Volume 1 catalog to announce their 44-Tonner with PS3.  Will it be 2R and 3R? Only 3R. That's too bad considering it had PS3 electronics (DCC included) and a correct, scale hood-width, which the WBB lacks.

Rich Yoder previously brought these out in brass years ago (now sold out) and they can be had on the secondary market pretty regularly.  Sunset did these as well even longer ago, but I believe they didn't run well.  Rich Yoder's 2R sold well and the 3R did not.  The main complaint by 3R modelers was that it didn't come with command control and buyers gawked at having to do the upgrade themselves in such tight spaces.  The 2R models could be upgraded to DCC with similar work, but there wasn't the same kind of griping by 2R modelers as HO decoders would work with this low-amp model.

There were rumors for a long time that MTH would bring this model out with their PS3 (would please both 2R an 3R command users), but while they admitted publicly that they wanted to do this model, their developments have been slow and no one really knows if MTH is still trying to pursue this model in their list of imports. (Seems doubtful after this last catalog, right?)

Now in April 2014, here comes Williams by Bachman, producing a scale 44T in plastic. Its somewhat surprising they're doing this since WBB isn't known for scale items (the scale-ish GP30's were also an interesting step.)  No command control and no 2R models.  They also didn't mention phases, but this one looks like a Phase IV prototype with the grills and no door in the front that I believe was the Phase I model.

I took some photos at York of what they had on the shelf for others to make their own judgements.

My opinion?
-3R's that don't use command control will like this and 2R straight DC guys might find this worth converting (the photos show scale wheels ironically), but the command crowd is going to need to look at a "sacrificial" modelers to see if someone can convert these at all. 

-I have my doubts that it can be easily converted to 3R TMCC and sound with ERR's sound commander 2 (SC2) demise.  No doubt the speaker in the fuel tank will need to be replaced with a small one and placed elsewhere to make room for electronics (if the fuel tank they have is even big enough...Rich Yoder had to enlarge his for the 3R lighting/directional electronics.)

-2R DCC guys that also want sound could probably get away with a soundtraxx Tsunami-750.

Alas, here are photos for you to make your own judgments.  I wish WBB well, but with MTH's announcement that we're 6 months or so away from them announcing theirs, WBB will be threatened by all of the folks who want a command version with sound.  Perhaps the market is still big enough for both.

As always, click the photos for higher resolution.


Wednesday, February 12, 2014

O Scale DCC Decoders

I think I'm going to post a few DCC tutorials on some items I'm working on...maybe they can help others in the market to learn more about DCC and easy it is to actually use...

Below is a chart of decoders that I'm vaguely familiar with at least in hearing, some more-so in actual usage on my own locomotives.  I have not extensively used any accessory or lighting decoders at this time.

This list is also not the end-all be-all of decoders for O-scale, again just decoders that I've heard of being used in O-scale.  Some of the other columns are to help compare price, current ratings, etc.  Prices can vary depending on who you buy from.  Shop around.  More detailed technical specs on all of these decoders can be found if you Google the product name with the manufacturer name. 


(Click on chart for full-size.)

Saturday, January 25, 2014

O Scale 2R LN Orange PS-3 HT

This is a repainted Lionel model modified with AtlasO trucks.  I made the decals for these using the lettering diagram and discussion with Curt Fortenberry.  The trucks even have the appropriate white labeling per the diagrams. Standard magnetic airhoses and cutlevers were added as well.  Photos below:


Side View.


Side View - Left.


Side View - Right.  ACI label is from microscale.


Angle - End View.


Lightly weathered interior since NEW in 1971, the last year or so in my timeframe.

O Scale 2R LN PS2-CD Coke Breeze LO

With the help of Steve Johnson, whom I'd consider a very knowledgeable L&N fan, I was able to draw a near 100% complete and accurate set of decals for the coke breeze P-S covered hoppers.  The main difference would be the multiple hatches on the AtlasO model vs. the one hatch on the prototype and the warnings associated with those hatches.

There were no special additions to the car, just repainting the car.  This car does has decals on the tops of the trucks, but they are hard to see, but were in the diagrams I saw, so I had them made.   I believe I bought the car used as part of the roofwalk was broken out of the box.  Pictures below and as with every blog post - are clickable for HI-RES versions.


Side View


Close up Side - Left.


Close Up Side - Right


End View - B Side.  Lettering on Reservoir not seen due to lighting.


Close up of Hatch warning label.


Every hatch has the same warning label.

Friday, January 24, 2014

late 1960's REAX BE Express Car

It's been awhile since I've posted any work.  I was waiting until I progressed further with the layout itself so I could display the new cars I've done with a decent background.  That was taking far too long, so here is one of the new cars I've repainted.

The original REA express cars from Weaver are all before my era as far as paint is concerned.  I needed an even lighter colored car and the new diamond REA emblem.

I did what research I could and Bob Heil was able to get me a photo from a book that showed what these cars looked like in the late 60's.  I used that photo and several others to reconstruct the lettering on the car (albeit slight liberties with a few portions of the text) and made my own decals.  I repainted a weaver car using testor's green zinc chromate enamel paint.  

I went through an ordeal of spraying this non-acrlyic paint and have come to the decision that even if the color exists in another type of paint I will mix and match any acrylic paint I need to until I get the right shade I want.  I don't want to be stuck buying expensive thinners that only work with one brand of paint.  This car took months to finally degas in my car due to using a lacquer thinner instead of testors thinner, but the lesson was learned and the car still came out nicely.  

The trucks also received the same green per prototype and these cars were taken over by Chicago Leasing Company, thus the CDRX reporting marks instead of REAX.  The middle ladders were constructed out of soldered brass using the photo as well.  I went ahead and bought a set of Rod Miller's castings for close-coupling capabilities of these cars.  They take a little work but make them look much nicer.


 Prototype Photo


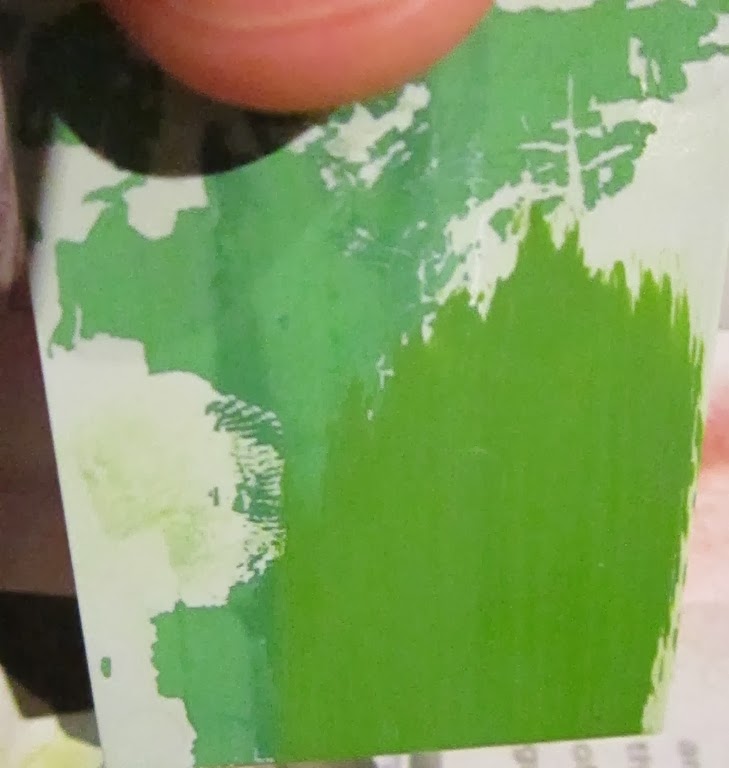
 The difference of greens...the original up top and the chromate to the right.


 Right side of car.


End of the car with the Rod Miller close-coupling specialty piece.

Second end photo.

Top left of car side.  Typically listed paint used and date.

Info lifted off the prototype photo for the bottom right of the car.

Side view.

The car completely apart and paint stripped.

How I mask off trucks for repainting without taking out the wheels.